Goulds Water Pump Repair Manual: A Comprehensive Guide
Goulds pump systems demand careful attention; this manual details installation‚ operation‚ and maintenance for optimal performance. Addressing network issues‚ and electrical safety are crucial.
Understanding Goulds Water Pumps
Goulds water pumps are renowned for their durability and efficiency‚ serving diverse applications from residential water supply to complex industrial processes. These pumps utilize centrifugal force to move fluids‚ employing impellers and casings designed for specific flow rates and pressure requirements. Constructed with stainless steel and other robust materials‚ Goulds pumps are built to withstand challenging conditions.
A key aspect of understanding Goulds pumps lies in recognizing their various types‚ including submersible‚ jet‚ and centrifugal models. Each type caters to unique needs‚ with submersible pumps ideal for well water extraction‚ jet pumps suited for shallow wells‚ and centrifugal pumps excelling in high-volume transfer. Proper installation‚ adhering to the Pump Safety Manual‚ is paramount for longevity.
Furthermore‚ understanding the internal components – the impeller‚ diffuser‚ seal‚ and motor – is crucial for effective troubleshooting and repair. Recognizing how these parts interact and contribute to overall pump function allows for targeted diagnostics when issues arise. Maintaining a stable network connection‚ while seemingly unrelated‚ can be vital for accessing digital manuals and parts diagrams.
Common Goulds Pump Models & Applications
Goulds offers a wide array of pump models tailored to specific applications. The 3196 i-FRAME series‚ a vertical multistage centrifugal pump‚ is frequently used for boosting pressure in commercial buildings and irrigation systems. Submersible pumps‚ like those used for well water‚ are popular in residential and agricultural settings‚ providing reliable water access.
Jet pumps‚ often found in shallower well applications‚ are valued for their simplicity and cost-effectiveness. Centrifugal pumps‚ in general‚ serve diverse industrial needs‚ including water transfer‚ chemical processing‚ and fire protection. Understanding the specific model is vital‚ as each has unique maintenance requirements.

Applications extend beyond water; Goulds pumps handle various fluids‚ necessitating material compatibility checks during repair. Troubleshooting Ethernet connection issues on a computer might seem unrelated‚ but accessing online parts diagrams and manuals relies on a stable network. Proper pump selection‚ guided by the installation‚ operation‚ and maintenance manual‚ ensures optimal performance and longevity.
Safety Precautions Before Repair
Prior to any Goulds pump repair‚ strict adherence to safety protocols is paramount. Always disconnect the pump from its power source – electrical shock hazards are significant. Depressurize the system completely‚ releasing any trapped water to prevent unexpected sprays or component ejection. Wear appropriate personal protective equipment (PPE)‚ including safety glasses‚ gloves‚ and potentially hearing protection.
Be mindful of hot surfaces‚ especially after pump operation. If dealing with potentially hazardous fluids‚ utilize appropriate respirators and protective clothing. Review the pump’s safety manual for specific warnings related to the model and application. Ensure adequate ventilation‚ particularly when working with solvents or cleaning agents.
Confirm the work area is clear of obstructions and well-lit. Troubleshooting network connectivity issues‚ while seemingly unrelated‚ highlights the importance of reliable access to safety data sheets (SDS) online. Remember‚ a safe repair is a successful repair; never compromise on safety procedures.
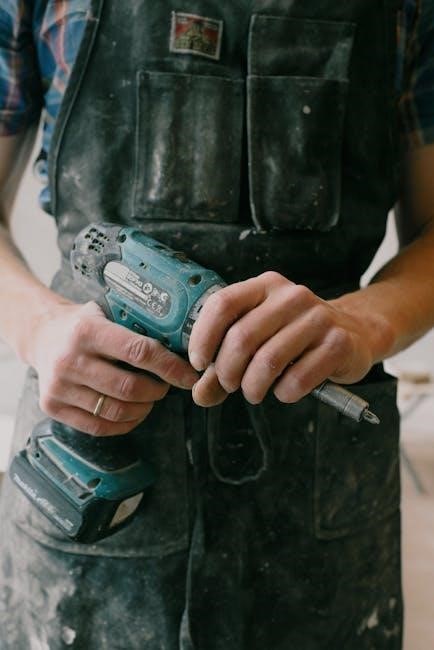
Essential Tools for Goulds Pump Repair
Successfully repairing a Goulds water pump necessitates a well-equipped toolkit. Basic hand tools – wrenches (various sizes‚ including pipe wrenches)‚ screwdrivers (Phillips and flathead)‚ pliers‚ and Allen wrenches – are fundamental. A multimeter is crucial for electrical testing‚ verifying voltage and continuity‚ akin to diagnosing network connectivity issues.
Specialized tools often prove invaluable. A bearing puller simplifies bearing removal‚ while an impeller puller aids in impeller extraction. Seal installers ensure proper seal seating‚ preventing leaks. Torque wrenches are essential for tightening fasteners to manufacturer specifications. Consider a hydraulic jack for larger pumps‚ facilitating safe lifting and maneuvering.
Diagnostic tools‚ like a clamp meter‚ can assess motor current draw. A set of feeler gauges helps verify clearances. Don’t overlook the importance of penetrating oil for loosening corroded parts and thread sealant for reassembly. Having access to the pump’s parts diagram‚ potentially accessed online‚ is also incredibly helpful.
Diagnosing Common Goulds Pump Problems
Effective diagnosis is paramount before initiating any Goulds pump repair. Begin by observing the pump’s behavior: is it failing to start‚ delivering reduced flow‚ or exhibiting excessive noise? Check for obvious issues like leaks‚ loose connections‚ or damaged wiring – similar to troubleshooting network problems.
A common issue is loss of prime‚ often indicated by the pump running but failing to move water. Motor overload‚ triggered by obstructions or excessive demand‚ can cause shutdowns. Electrical faults‚ such as tripped breakers or burnt wiring‚ require immediate attention and a multimeter for testing.
Inspect the impeller for damage or blockage. Examine seals for wear or leakage. Listen for unusual bearing noises‚ suggesting potential bearing failure. Reduced flow could stem from a clogged intake‚ a worn impeller‚ or internal restrictions. Remember to consult the pump’s manual for specific troubleshooting guidance and safety precautions.
Loss of Prime Troubleshooting
Loss of prime is a frequent Goulds pump issue‚ manifesting as the pump running without water delivery. First‚ verify the suction line is completely submerged and free of leaks – akin to checking Ethernet connections for breaks. Inspect the foot valve for debris or failure; a faulty valve prevents water from being drawn into the pump.
Air leaks in the suction piping are a primary cause. Thoroughly check all joints‚ fittings‚ and connections for tightness. Examine the pump casing and impeller area for cracks or damage that could introduce air. Ensure the pump shaft seal is intact‚ preventing air ingress.
After addressing potential leak points‚ attempt to re-prime the pump following the manufacturer’s instructions. This usually involves opening a priming port and allowing the pump to draw water. If re-priming fails‚ investigate potential obstructions in the suction line or impeller. Consistent loss of prime suggests a more significant underlying issue requiring professional attention.
Motor Overload Protection & Repair
Goulds pump motors are typically equipped with overload protection‚ crucial for preventing damage from excessive current draw – similar to surge protection for sensitive electronics. This protection usually takes the form of a thermal overload relay or a circuit breaker. If the motor repeatedly trips the overload‚ investigate the cause rather than simply resetting it.
Common causes include a locked impeller (due to debris)‚ excessive system head (resistance to flow)‚ or a failing pump bearing. Verify the impeller spins freely. Check for obstructions in the suction or discharge lines. Ensure the voltage supply matches the motor’s specifications; low voltage can cause overheating.
If the overload continues to trip‚ or if the motor exhibits signs of overheating (burnt smell‚ discolored windings)‚ it may require professional repair or replacement. Inspect the motor windings for shorts or open circuits. A qualified electrician should handle any electrical repairs‚ adhering to all safety precautions.

Electrical Issues & Wiring Checks
Goulds pump electrical problems demand meticulous attention to safety; always disconnect power before inspecting wiring. Begin by verifying the power supply voltage matches the pump’s requirements. Check the circuit breaker or fuse protecting the pump – a tripped breaker or blown fuse indicates a short circuit or overload.
Inspect all wiring connections for looseness‚ corrosion‚ or damage. Tighten any loose connections and replace corroded or damaged wires. Use a multimeter to check for continuity in the wiring‚ ensuring a complete circuit. Look for signs of burnt wiring or insulation‚ which indicate overheating and potential hazards.
If the pump fails to start‚ check the motor’s start capacitor (if equipped). A faulty capacitor can prevent the motor from starting. Ethernet connection issues can sometimes mimic electrical faults‚ so rule those out. If problems persist‚ consult a qualified electrician for further diagnosis and repair‚ prioritizing safety at all times.
Goulds Pump Component Replacement
Goulds pump longevity relies on timely component replacement. Before starting‚ disconnect power and relieve system pressure. Identifying the correct replacement parts is crucial; consult the pump’s manual or parts diagram. Begin with simpler replacements like O-rings and gaskets‚ ensuring proper lubrication during installation.

For more complex components like impellers or diffusers‚ carefully document the disassembly process with photos. This aids reassembly. Stainless steel parts‚ common in Goulds pumps‚ require appropriate tools to prevent damage. Ensure all new components are compatible with the pumped liquid to avoid corrosion.
After replacement‚ thoroughly inspect the pump for leaks and proper operation. Verify correct rotation direction and check for unusual noises or vibrations. Addressing Ethernet connectivity issues during downtime is wise. Proper component replacement extends pump life and maintains efficient performance‚ preventing costly repairs.
Impeller Replacement Procedures
Impeller replacement demands precision. First‚ isolate the pump and drain all liquids. Carefully disassemble the pump casing‚ noting the impeller’s orientation and any wear patterns. Inspect the wear rings and shaft for damage; replace if necessary. Removing a stuck impeller often requires specialized pullers – avoid forceful methods that could damage the shaft.
Before installing the new impeller‚ clean the shaft and housing thoroughly. Lubricate the shaft with a suitable grease to facilitate installation. Ensure the impeller is correctly aligned with the shaft keyway. Tighten the impeller retaining nut to the manufacturer’s specified torque.
Post-installation‚ manually rotate the impeller to confirm free movement. Reassemble the pump casing‚ ensuring proper gasket seating. Address any network issues during downtime. Finally‚ test the pump‚ monitoring for leaks‚ vibrations‚ and proper flow rate. A correctly replaced impeller restores pump efficiency and prevents further damage.
Seal Replacement: Step-by-Step Guide
Seal replacement is critical for preventing leaks and maintaining pump efficiency. Begin by disconnecting power and draining the pump completely. Disassemble the pump‚ carefully removing the old seal components – the rotating and stationary faces. Inspect the shaft and seal housing for corrosion or damage; address these issues before proceeding.
Clean the shaft and housing meticulously‚ removing all traces of the old seal material. Lubricate the new seal faces with a clean‚ compatible fluid. Carefully install the stationary seal component into the housing‚ ensuring a proper fit. Next‚ install the rotating seal component onto the shaft‚ aligning it correctly with the stationary seal.
Reassemble the pump‚ ensuring proper gasket seating. Before restarting‚ manually rotate the shaft to verify smooth operation. Test the pump‚ monitoring for leaks and unusual noises. Remember to address any underlying network problems during maintenance. A properly installed seal ensures reliable‚ leak-free operation.
Bearing Replacement & Lubrication
Bearing failure often manifests as excessive noise or vibration. Begin by safely disconnecting power and disassembling the pump to access the bearings. Carefully remove the old bearings‚ noting their orientation for correct reinstallation. Inspect the bearing housing and shaft for wear or damage; replace if necessary;
Clean the housing and shaft thoroughly before installing new bearings. Use a bearing press or appropriate tools to gently press the new bearings into place‚ avoiding any impact. Ensure the bearings are seated squarely and rotate freely. Proper lubrication is paramount; select a grease compatible with the pump’s operating conditions.
Apply grease according to the manufacturer’s specifications‚ avoiding over- or under-lubrication. Reassemble the pump‚ verifying proper alignment. Test run the pump‚ listening for any unusual sounds. Addressing Ethernet connection issues during downtime is efficient. Regular bearing inspection and lubrication extend pump life and prevent catastrophic failure.
Pump Housing & Casing Repair
The pump housing and casing protect internal components and maintain system pressure. Inspect for cracks‚ corrosion‚ or erosion during routine maintenance. Small cracks can often be repaired using epoxy specifically designed for metal or composite materials‚ ensuring a watertight seal. Thoroughly clean and prepare the surface before applying the epoxy‚ following the manufacturer’s instructions.
For larger cracks or significant damage‚ casing replacement is generally recommended to maintain structural integrity. Corrosion can be addressed by cleaning the affected area‚ applying a corrosion inhibitor‚ and potentially coating the housing with a protective layer. Ensure compatibility between the coating and the housing material.
Regularly check for signs of water leakage around the casing. Addressing network problems during repairs minimizes downtime. Proper housing maintenance prevents further damage and ensures efficient pump operation. Always prioritize safety when working with pressurized systems and electrical components‚ referencing the pump safety manual.
Identifying and Repairing Cracks
Cracks in the pump housing or casing compromise its structural integrity and can lead to leaks‚ reducing efficiency and potentially causing system failure. Thorough visual inspections during maintenance are crucial for early detection. Look for hairline fractures‚ especially around stress points like welds or mounting brackets.
Small‚ non-through cracks can often be repaired using epoxy resins formulated for metal bonding. Surface preparation is paramount: clean the area with a solvent‚ remove loose debris‚ and roughen the surface for better adhesion. Apply the epoxy according to the manufacturer’s instructions‚ ensuring complete coverage.
Larger or through-wall cracks typically necessitate component replacement. Attempting to weld cracks in certain materials can weaken the metal. Prioritize safety; depressurize the system before any repair work. Addressing network issues alongside pump repairs streamlines the process. Consult the pump’s safety manual for specific guidance and always use appropriate personal protective equipment.
Corrosion Prevention & Treatment
Goulds pumps‚ especially those handling aggressive fluids‚ are susceptible to corrosion. Prevention is key: select pump materials compatible with the pumped liquid. Stainless steel components offer excellent resistance‚ but even they can corrode under specific conditions. Regular inspections are vital to identify early signs of corrosion‚ such as pitting or discoloration.
For minor surface corrosion‚ wire brushing or abrasive blasting can remove affected material. Following this‚ applying a protective coating – epoxy paint or specialized corrosion inhibitors – creates a barrier against further degradation. Ensure the surface is thoroughly cleaned and primed before coating.

Severe corrosion may require component replacement. When replacing parts‚ consider upgrading to more corrosion-resistant materials. Maintaining proper system filtration minimizes abrasive particles that accelerate corrosion. Addressing network connectivity issues alongside pump maintenance improves overall system reliability. Always consult the pump’s manual for recommended corrosion prevention strategies.
Maintenance Schedules & Best Practices
Establishing a robust maintenance schedule is paramount for Goulds pump longevity. A tiered approach – daily‚ weekly‚ monthly‚ and annual – ensures comprehensive coverage. Daily checks include visual inspections for leaks‚ unusual noises‚ and vibration. Weekly tasks encompass monitoring pump performance parameters like pressure and flow rate‚ alongside basic cleaning.
Monthly maintenance should involve lubrication of bearings (following manufacturer’s specifications)‚ electrical connection checks‚ and a thorough inspection of seals for wear. Annual maintenance demands a complete pump overhaul‚ including impeller inspection‚ casing examination‚ and motor testing.
Best practices include keeping detailed maintenance logs‚ utilizing genuine Goulds replacement parts‚ and adhering strictly to the pump’s operation manual. Proactive maintenance minimizes downtime‚ prevents catastrophic failures‚ and extends the pump’s service life. Remember to address any network issues promptly to maintain system monitoring capabilities.
Preventative Maintenance Checklist
A comprehensive checklist is vital for consistent Goulds pump upkeep. Begin with a visual inspection: check for leaks around seals‚ casing‚ and connections. Verify proper motor ventilation – ensure vents aren’t obstructed. Assess electrical connections for corrosion or looseness; tighten as needed. Monitor bearing temperature during operation – excessive heat indicates potential failure.
Next‚ examine the impeller for wear‚ corrosion‚ or blockage. Inspect the pump casing for cracks or signs of erosion. Test the motor overload protection system to confirm functionality. Lubricate bearings according to the manufacturer’s recommendations‚ using the specified lubricant type.
Finally‚ review system pressure and flow rates‚ comparing them to baseline readings. Address any discrepancies immediately. Regularly update network configurations for optimal monitoring. Document all maintenance activities‚ including dates‚ tasks performed‚ and parts replaced. This proactive approach minimizes downtime and maximizes pump efficiency‚ preventing costly repairs and ensuring reliable operation.
Winterizing Your Goulds Pump
Proper winterization is crucial to prevent damage from freezing temperatures. Begin by completely draining the pump casing and suction line; open drain plugs and valves. Disconnect and drain all external piping‚ including supply lines and sprinkler systems. Remove any impellers or diffusers susceptible to freezing‚ storing them in a dry‚ heated location.

Introduce RV antifreeze into the pump casing and suction line to displace any remaining water. Ensure the antifreeze is compatible with pump materials. Inspect and protect electrical connections from moisture and corrosion; consider using waterproof covers. Verify the motor is dry and free from condensation.
If the pump is located outdoors‚ provide additional insulation to protect it from extreme cold. Regularly check for leaks or damage throughout the winter months. Remember to address any network issues before the freeze. Upon spring thaw‚ thoroughly flush the system with clean water before restarting‚ and re-install any removed components.
Finding Goulds Pump Parts & Manuals
Locating genuine Goulds pump parts and comprehensive manuals is essential for effective repair and maintenance. The official Goulds website (gouldspumps.com) serves as a primary resource‚ offering a detailed parts catalog and downloadable manuals categorized by pump model. Authorized Goulds distributors also provide access to parts and documentation; their expertise can be invaluable.
When searching for parts‚ having the pump’s model and serial number readily available is crucial for accurate identification. Online marketplaces may offer parts‚ but verifying authenticity and compatibility is paramount. Always prioritize genuine Goulds components to ensure optimal performance and longevity.
For older models‚ archived manuals might be available through specialized industrial parts suppliers or online forums dedicated to pump repair. Remember to consult the manual for specific installation‚ operation‚ and safety guidelines. Addressing network connectivity issues can aid in online searches. Proper documentation ensures successful repairs and prevents future problems.