Marie Callender’s Frozen Pies: Cooking Instructions
Unlock the deliciousness of Marie Callender’s frozen pies with ease! These simple, step-by-step instructions guarantee perfectly baked pies every single time. From the classic apple to decadent chocolate, discover your new favorite dessert and get baking!
Preparing Your Marie Callender’s Frozen Pie
Before you embark on baking your Marie Callender’s frozen pie, a little preparation is key. This ensures that your pie bakes evenly and achieves that perfect golden-brown crust. First, preheat your oven according to the instructions provided on the pie’s packaging. While the oven is preheating, take the frozen pie out of the freezer.
Next, carefully remove the plastic wrapper from the pie. For fruit pies, such as apple or cherry, consider brushing the top crust with milk and sprinkling with sugar. This simple step will give your pie a beautiful, caramelized finish. If you’re using a pre-baked shell, thaw it for about 10 minutes at room temperature, then prick the bottom and sides thoroughly with a fork before baking. This will prevent the crust from puffing up too much during baking. With these steps, your pie will be ready for the oven.
Removing Packaging
Before baking your Marie Callender’s frozen pie, it’s essential to properly remove all packaging to ensure a safe and successful baking experience. The first step involves taking the frozen pie directly from your freezer. Then, carefully inspect the pie for any outer packaging, such as cardboard boxes or plastic wrap. Gently peel away and discard any cardboard or paper coverings that might be present.
Next, focus on removing the plastic wrap that encases the pie. This plastic wrap is designed to protect the pie during freezing but must be removed before baking to prevent melting or burning. To remove it, find an edge or seam and carefully peel the plastic away from the pie, ensuring that no pieces remain attached. Be extra cautious to avoid tearing the pie crust while removing the plastic. Once all packaging is removed, your pie is ready for the next step in the baking process.
Preheating the Oven
Preheating your oven is a crucial step in baking a Marie Callender’s frozen pie, ensuring that the pie bakes evenly and achieves a perfectly golden crust. Before you even think about taking the pie out of the freezer, turn on your oven and set it to the recommended temperature specified on the pie’s packaging. For most Marie Callender’s pies, this temperature is typically around 400°F (200°C).
Allow your oven to preheat fully before placing the pie inside. This usually takes about 15 to 20 minutes, depending on your oven model. To ensure accurate temperature, you can use an oven thermometer. A preheated oven provides consistent heat, which is essential for the pie crust to bake properly and prevent a soggy bottom. Once the oven is fully preheated, you’re ready to proceed with the next steps in baking your delicious Marie Callender’s frozen pie.
Recommended Oven Temperature
Achieving the perfect bake for your Marie Callender’s frozen pie heavily relies on setting the correct oven temperature. The recommended temperature is often around 425 degrees Fahrenheit. However, it’s imperative to always check the specific instructions on your pie’s packaging, as different pie varieties might require slight adjustments to ensure optimal results.
Maintaining the right temperature ensures that the crust bakes evenly, turning a beautiful golden brown, while the filling heats thoroughly without burning. Using an oven thermometer can help you verify that your oven is accurately reaching and maintaining the recommended temperature. Fluctuations in oven temperature can lead to uneven baking, so ensuring consistency is key. For instance, baking a frozen Marie Callender’s pie crust, it’s crucial to follow the recommended temperature.
Fruit Pie Preparation
Preparing a fruit pie from frozen involves a few simple steps to ensure a delicious outcome. Begin by removing the plastic wrapper from the frozen pie, being careful not to damage the crust. While the oven is preheating, take the frozen Marie Callender’s pie out of the freezer and remove the plastic wrap.
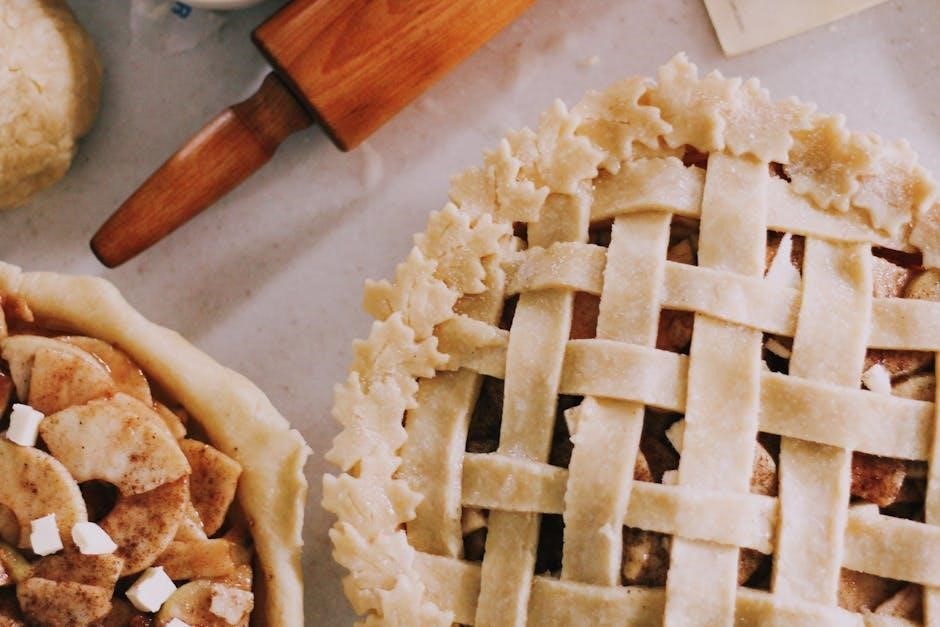
For fruit pies, such as apple or cherry, consider brushing the top crust with milk or an egg wash. This will help the crust achieve a beautiful golden-brown color during baking. After brushing, sprinkle the top crust with a bit of granulated sugar for a delightful caramelized finish. The sugar adds a touch of sweetness and enhances the crust’s texture. These simple steps will contribute to a perfectly baked fruit pie with an appealing appearance and irresistible taste.
Brushing with Milk and Sprinkling with Sugar
Before baking your Marie Callender’s fruit pie, consider brushing the top crust with milk or an egg wash. This simple step will significantly enhance the pie’s appearance, giving it a beautiful, glossy, golden-brown finish. The milk or egg wash acts as a glaze, promoting even browning and a more appealing crust.
After brushing, sprinkle the top crust generously with granulated sugar. The sugar not only adds a touch of sweetness but also caramelizes during baking, creating a delightful, slightly crunchy texture. The combination of the golden-brown crust and the caramelized sugar elevates the pie’s flavor and visual appeal. This technique is particularly effective for fruit pies like apple, cherry, or berry varieties. It helps to create a professional-looking pie with an irresistible taste.
Baking Instructions
Once your oven is preheated to the recommended temperature, and your pie is prepared with a milk wash and sugar sprinkle (if applicable), it’s time to bake. Place the pie on a baking sheet in the center of the preheated oven. This ensures even heat distribution and prevents the bottom crust from burning.
Bake the pie for the recommended time, usually 65 to 75 minutes, or until the crust is golden brown and the filling is bubbling. Baking times may vary depending on the specific type of pie and your oven’s calibration, so keep a close eye on it.
If the crust starts to brown too quickly, you can cover the edges with strips of aluminum foil to prevent burning. This will allow the filling to cook through without the crust becoming overly dark.
Baking Time for Fruit Pies
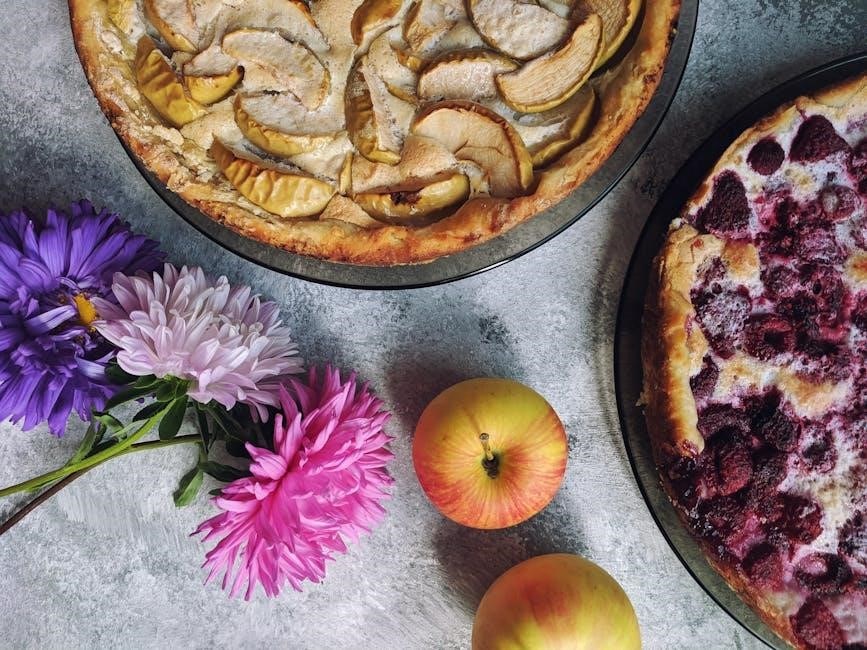
For fruit pies, such as apple, cherry, or berry varieties, the baking time typically ranges from 65 to 75 minutes. However, it’s crucial to monitor the pie closely during baking, as oven temperatures can vary. The pie is done when the crust is golden brown and the filling is bubbling, especially around the edges. The outside edge of the filling should be firm, and the center slightly domed.
If the crust starts to brown too quickly, cover the edges with foil to prevent burning. If you find that the top crust is browning too fast before the filling is cooked, you can tent the entire pie loosely with foil. This will help to slow down the browning process and allow the filling to cook through evenly. Remember to remove the foil during the last 15-20 minutes of baking to allow the crust to achieve a golden-brown color.
Baking Time for Other Pies
For pies that are not fruit-based, such as cream pies, custard pies, or pumpkin pies, the baking time may vary. Typically, these pies require a baking time of around 55 to 65 minutes. It’s crucial to check for doneness by observing the filling. A custard or cream pie is ready when the filling is set but still has a slight jiggle in the center;
For pumpkin pies, the baking time is similar, around 60 to 70 minutes. The pie is done when the filling is set and a knife inserted near the center comes out clean. If the crust begins to brown too quickly, you can cover the edges with foil to prevent burning. Remember to monitor the pie closely and adjust the baking time as needed, based on your oven and the specific type of pie you are baking. Always handle the pie carefully when removing it from the oven, as it will be hot.
Baking on a Baking Sheet
Always bake your Marie Callender’s frozen pie on a baking sheet. Placing the pie on a baking sheet serves several important purposes. Firstly, it provides a stable and even surface for the pie to bake on, preventing it from tipping or spilling in the oven. Secondly, the baking sheet helps to catch any drips or spills that may occur during baking, keeping your oven clean and preventing messes.
Additionally, a baking sheet can help to distribute heat more evenly around the pie, ensuring that the crust bakes uniformly and doesn’t burn in certain spots. For best results, use a large baking sheet that is slightly bigger than the pie. Center the pie on the baking sheet before placing it in the preheated oven. This simple step can make a significant difference in the final outcome of your baked pie. It ensures even cooking and easy cleanup!
Checking for Doneness

Determining when your Marie Callender’s frozen pie is perfectly baked requires careful observation. The baking time provided on the packaging is a guideline, but the actual time may vary depending on your oven. To check for doneness, start by observing the crust. It should be a golden brown color, indicating that it is cooked through and has a flaky texture.
For fruit pies, gently shake the pie. The filling should be firm around the edges but still slightly jiggly in the center. If the filling is too liquid, it needs more baking time. For cream or custard pies, the filling should be set and not wobbly. You can also insert a knife into the center of the pie; if it comes out clean, the pie is likely done. Remember to handle the pie carefully, as it will be very hot. These visual cues will help you achieve baking perfection!
Filling Firmness
Achieving the perfect filling firmness is crucial for a delightful Marie Callender’s frozen pie. For fruit pies, the filling should be bubbly around the edges, indicating that the fruit has softened and the juices have thickened. Gently shake the pie; the center should have a slight jiggle, but not be overly liquid. If the filling appears too runny, continue baking for a few more minutes, checking frequently.
For pies with custard or cream fillings, firmness is even more critical. The filling should be set and no longer wobbly when gently nudged. Inserting a clean knife into the center should result in a clean blade, indicating that the filling has solidified. Avoid overbaking, as this can lead to a dry or cracked filling. Allow the pie to cool completely before serving to allow the filling to fully set and achieve the desired consistency. A firm filling ensures each slice holds its shape and delivers the intended flavor.
Crust Color
The crust color of your Marie Callender’s frozen pie is a key indicator of doneness. Aim for a golden-brown hue, which signifies that the crust is fully baked and has a delightful, slightly crisp texture. The edges of the crust should be a deeper shade of golden brown, indicating they are perfectly caramelized. If the crust is browning too quickly, especially around the edges, use foil to prevent burning.
Check the bottom crust as well; it should be cooked through and not doughy. If the top crust is browning nicely but the bottom seems pale, consider placing the pie on a lower rack in the oven for the last few minutes of baking. The overall crust color should be uniform and appealing, enhancing the visual appeal of the pie. A well-baked crust provides a sturdy base for the filling and contributes to the overall flavor and texture of the pie, making it a delightful dessert.
Cooling and Serving
After baking your Marie Callender’s frozen pie to a perfect golden-brown, the cooling process is crucial for both flavor and texture development. Allow the pie to cool completely on a wire rack before serving. This cooling period allows the filling to set properly, preventing it from being too runny when sliced. For fruit pies, a longer cooling time is recommended to ensure the filling firms up.
Once the pie has cooled, you can slice and serve it. A sharp knife, preferably warmed slightly under hot water, will help create clean, even slices. For an extra touch, consider adding a dollop of whipped cream or a scoop of vanilla ice cream alongside each slice. This complements the flavors of the pie and adds a delightful contrast in temperature and texture. Enjoy your perfectly baked and cooled Marie Callender’s pie!
Cooling Time
Allowing adequate cooling time for your Marie Callender’s frozen pie is essential for optimal flavor and texture. After removing the pie from the oven, place it on a wire rack to cool. For fruit pies, a cooling time of at least two to three hours is recommended. This extended cooling period allows the fruit filling to thicken and set properly, preventing a runny or overly liquid consistency when slicing.
For pies with cream or custard fillings, cooling in the refrigerator is necessary to ensure food safety and prevent bacterial growth. Refrigerate these pies for at least four hours, or preferably overnight, before serving. Cooling allows the flavors to meld together and the filling to achieve the desired firmness. Rushing the cooling process can result in a pie that is difficult to slice and less enjoyable to eat. Patience is key to a perfect pie experience!
Tips and Tricks
Baking a perfect Marie Callender’s pie from frozen can be tricky, but with these tips and tricks, success is within reach. First, thaw the frozen pie crust in the refrigerator for 15-20 minutes before baking. For fruit pies, brush the top crust with milk and sprinkle with sugar for a golden, caramelized finish. If the crust edges brown too quickly, use foil to prevent burning.
Adjust baking time based on your oven and desired results. If apples are hard, bake longer, covering the edges to prevent burning. For pre-baked shells, thaw for ten minutes, prick with a fork, and bake at 400°F for 12-15 minutes. To prevent a soggy bottom crust, bake on a baking sheet. Cooling completely is crucial for firm filling. These tips ensure a delicious, perfectly baked pie every time!
Thawing the Pie Crust
Thawing the pie crust is a crucial step for achieving a perfectly baked Marie Callender’s pie. While some might skip this step, allowing the crust to thaw slightly ensures even baking and prevents a doughy or undercooked result. The recommended method is to thaw the frozen pie crust in the refrigerator for approximately 15 to 20 minutes.
This gradual thawing process helps to relax the dough, making it more pliable and less prone to cracking during baking. If you’re short on time, you can thaw it at room temperature, but keep a close eye on it to ensure it doesn’t become too soft or sticky. Avoid using a microwave, as this can cause uneven thawing and compromise the crust’s texture. Properly thawing the crust sets the stage for a golden brown, flaky, and delicious pie.
Using Foil to Prevent Burning
To prevent the edges of your Marie Callender’s pie crust from burning during baking, a simple yet effective trick is to use aluminum foil. As the pie bakes, the edges of the crust are often exposed to more direct heat, making them susceptible to over-browning or burning before the filling is fully cooked. To combat this, create a foil shield for the crust.
Cut strips of aluminum foil and gently wrap them around the edges of the pie, covering the exposed crust. This acts as a barrier, deflecting some of the heat and allowing the crust to bake evenly without burning. You can remove the foil during the last 15-20 minutes of baking to allow the crust to achieve a beautiful golden-brown color. This simple technique ensures a perfectly baked pie with a crust that’s both visually appealing and delicious.
Adjusting Baking Time Based on Results
Achieving the perfect Marie Callender’s frozen pie sometimes requires adjusting the baking time based on your oven and desired results. Ovens can vary in temperature accuracy, so closely monitor your pie as it bakes. If the crust is browning too quickly, but the filling isn’t set, reduce the oven temperature by 25 degrees Fahrenheit and continue baking.
Conversely, if the crust is golden, and the filling is still too liquidy, increase the baking time in short increments, checking for doneness every 5-10 minutes. Remember that the pie is fully baked when the outside edge of the filling is firm, and the center is slightly domed. Don’t be afraid to experiment with baking times to achieve the perfect balance of a golden crust and a perfectly set filling.
Troubleshooting
Baking a Marie Callender’s frozen pie should be straightforward, but sometimes issues arise. If your crust is browning too quickly, use foil to prevent burning, focusing on the edges. A soggy bottom crust might indicate insufficient baking time or too low of an oven temperature; ensure your oven is properly preheated and consider baking the pie on a lower rack.
If the filling is bubbling over, reduce the oven temperature slightly. Hard apples in fruit pies are often due to underbaking, so increase the baking time and check for doneness regularly. Remember, patience is key. Addressing these issues will help you achieve that perfect, delicious pie every time.
Hard Apples in Fruit Pies
Encountering hard apples in your Marie Callender’s fruit pie can be disappointing, but understanding the causes can help you avoid this issue in the future. Typically, hard apples result from underbaking or uneven heat distribution. Ensure your oven is preheated to the recommended temperature and that the pie is placed in the center of the oven for even baking.
Increasing the baking time can help soften the apples, but monitor the crust to prevent burning. Covering the edges with foil can slow down browning while allowing the filling to cook thoroughly. Another trick is to ensure the pie isn’t too high in the oven, which can cause the crust to brown before the filling is fully cooked. If problems persist, consider slightly lowering the oven temperature and extending the baking time even further.